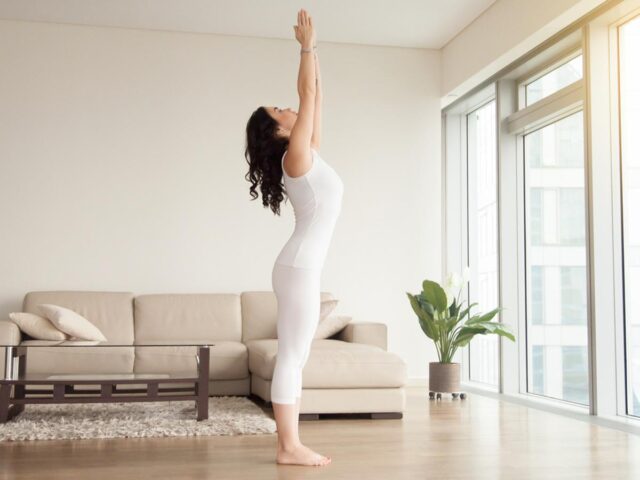
Practising standing yoga poses can be an effective way to improve focus and concentration, as they require stability, balance, and mindfulness. Asanas like Mountain pose, Tree pose and others are some of the best poses to improve concentration.
If you have trouble staying focused, here are four standing yoga poses you should include in your workout routine.
4 Best standing yoga poses that help improve focus and concentration
• Tadasana (Mountain Pose)
 © iStock
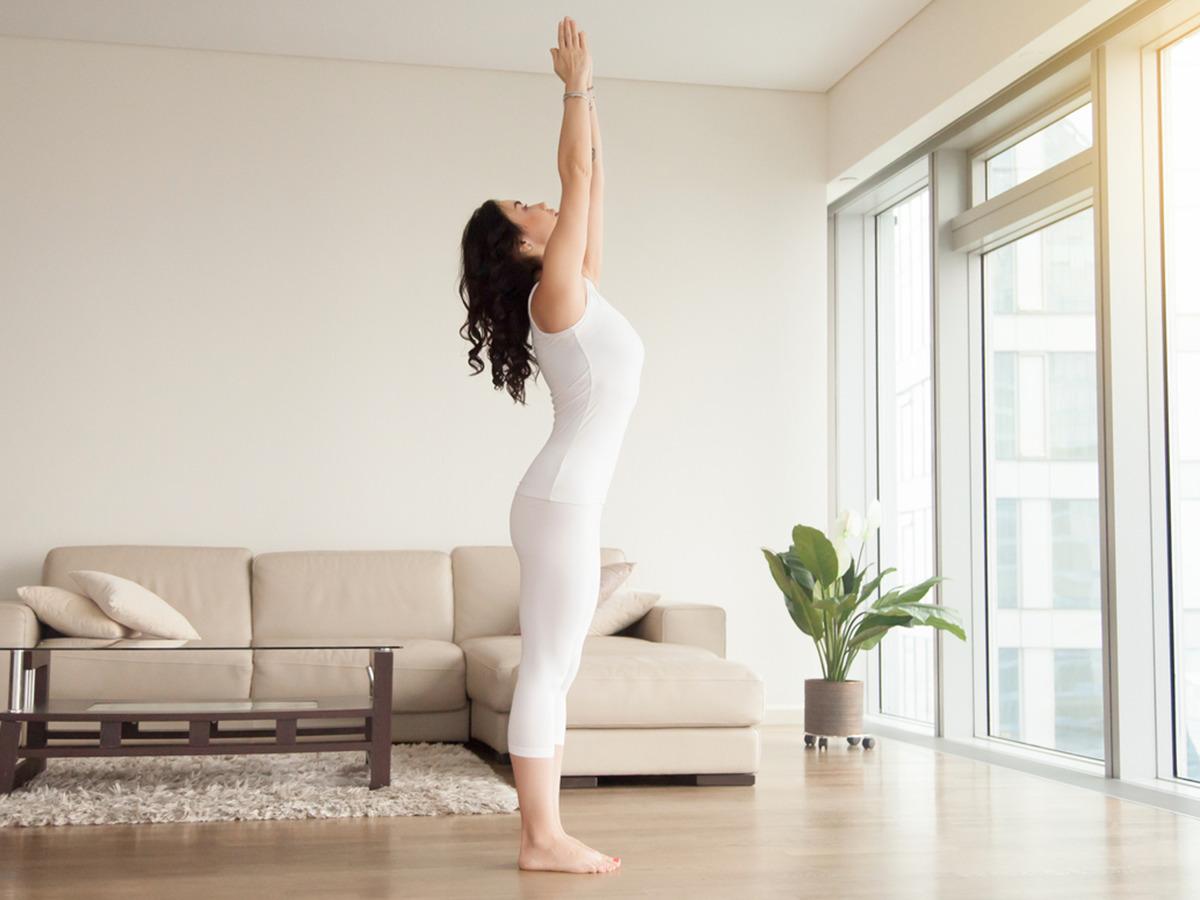
Tadasana, also known as Mountain Pose, is a foundational standing yoga pose that forms the basis for many other postures. It may seem simple, but it is a fundamental pose that helps improve posture, alignment, and mindfulness.
Steps to practise Tadasana (Mountain Pose):
1. Starting position:
• Begin by standing tall with your feet together, heels slightly apart, and toes pointing forward. Distribute your weight evenly across both feet.
2. Alignment of feet and toes:
• Keep your feet grounded, and spread your toes wide. Press all four corners of each foot into the ground – the base of the big toe, the base of the little toe, and both sides of the heel.
3. Engage the legs:
• Firm your leg muscles without locking your knees. Imagine lifting your kneecaps upward to engage the quadriceps.
4. Pelvis and spine alignment:
• Lengthen your tailbone down toward the floor to engage your core and maintain a neutral pelvis. Avoid tilting your pelvis forward or backward.
• Lengthen your spine, imagining a straight line from the base of your spine to the crown of your head.
5. Shoulders and arms:
• Roll your shoulders back and down, opening your chest and broadening the collarbones.
• Allow your arms to relax by your sides with your palms facing forward.
6. Neck and head:
• Keep your neck long and in line with your spine. Avoid tilting your head forward or backward.
• Gently tuck your chin in slightly, maintaining a neutral position for your neck.
7. Breath and gaze:
• Breathe deeply and evenly, allowing your breath to flow naturally.
• Soften your gaze and find a point to focus on in front of you. This is known as your “drishti” and helps improve concentration during the pose.
8. Mindfulness:
• Bring your awareness to the present moment, tuning into your body and breath. Feel the sense of grounding and stability in the pose.
Modifications:
• If you have difficulty keeping your feet together, you can place them hip-width apart to make the pose more accessible.
• For individuals with lower back issues, it’s essential to engage the core muscles and avoid overarching the lower back.
• Vrikshasana (Tree Pose)
 © iStock
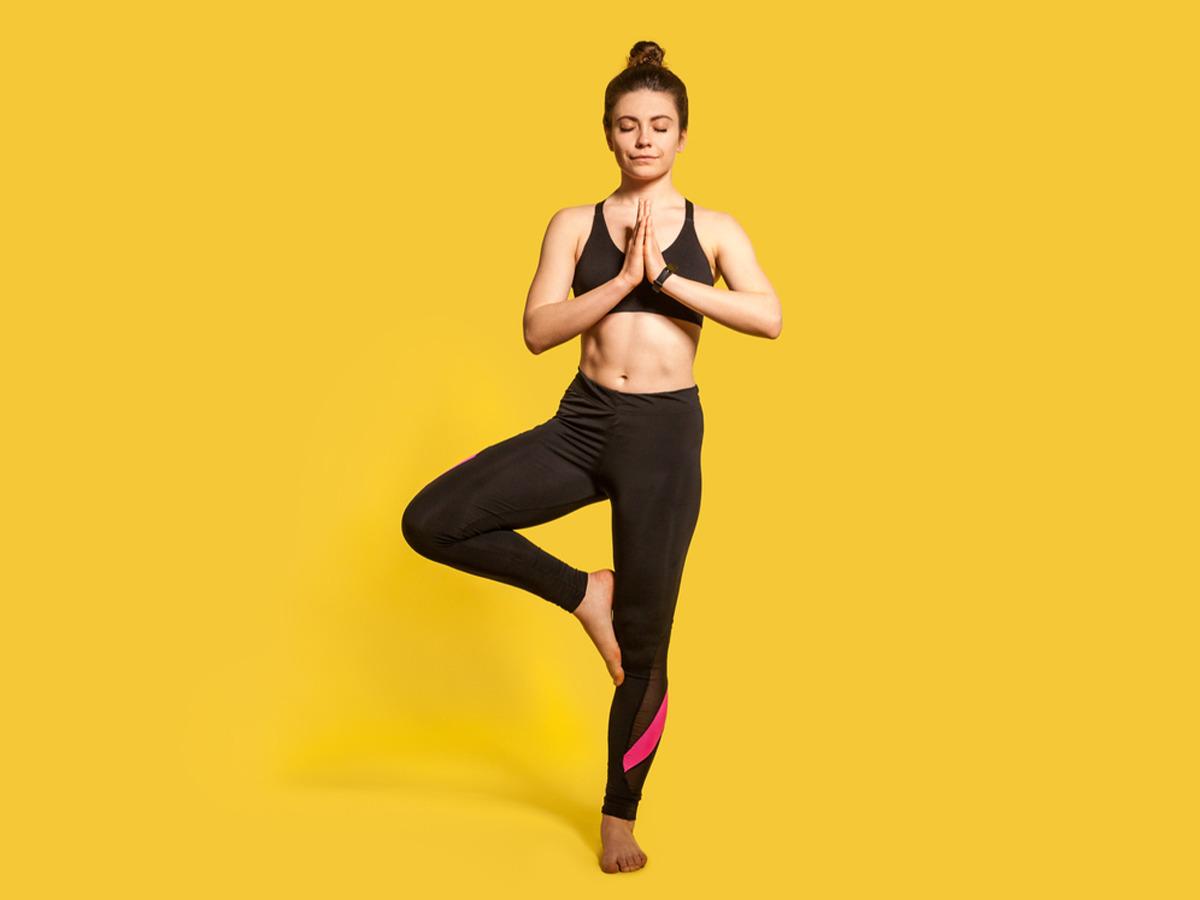
Tree Pose, known as Vrikshasana in Sanskrit, is a popular standing yoga pose that focuses on balance, stability, and concentration. It mimics the image of a tree, with one foot rooted to the ground and the other lifted and balanced on the standing leg.
Steps to practise Tree Pose (Vrikshasana):
1. Starting position:
• Begin by standing in Tadasana (Mountain Pose) with your feet together and arms at your sides.
2. Shift your weight:
• Shift your weight onto your left foot, grounding it firmly into the floor.
• Keep the toes spread wide for better stability.
3. Lift your right leg:
• Bend your right knee and bring the sole of your right foot to rest on your left inner thigh.
• Your right heel should press gently into the inner thigh, and the toes can be pointing downward.
• If you find it challenging to place your foot on your inner thigh, you can rest it on your left calf or ankle (avoid placing it on the knee joint to prevent injury).
4. Balance and stability:
• Find a point of focus in front of you, known as your “drishti.”
• It can be a spot on the floor or a stationary object. Steady your gaze on this point to help maintain your balance.
5. Hands placement:
• Bring your hands together in a prayer position (Anjali Mudra) at your heart centre.
• Alternatively, you can raise your arms overhead, keeping them shoulder-width apart.
6. Maintain alignment:
• Lengthen your spine and engage your core muscles to help stabilise your body.
• Roll your shoulders back and down, opening your chest.
• Keep your hips squared to the front, avoiding any tilting.
7. Breathing:
• Take deep and steady breaths throughout the pose.
• Breathing mindfully can help you stay focused and balanced.
8. Hold the pose:
• Hold the Tree Pose for several breaths or as long as you feel comfortable.
• It’s okay if you wobble or lose balance; simply bring your foot back to the floor and try again.
9. Switch sides:
• Release the pose by lowering your right foot back to the floor.
• Take a moment to ground both feet in Tadasana before repeating the pose on the other side, shifting your weight to your right foot and placing your left foot on the inner right thigh or calf.
Modifications:
• If you find it challenging to balance with your foot on your inner thigh, you can place your foot on the calf or ankle of the standing leg.
• You can also practise the pose near a wall or use a chair for support until you feel more stable.
• Natarajasana (Dancer Pose)
 © iStock
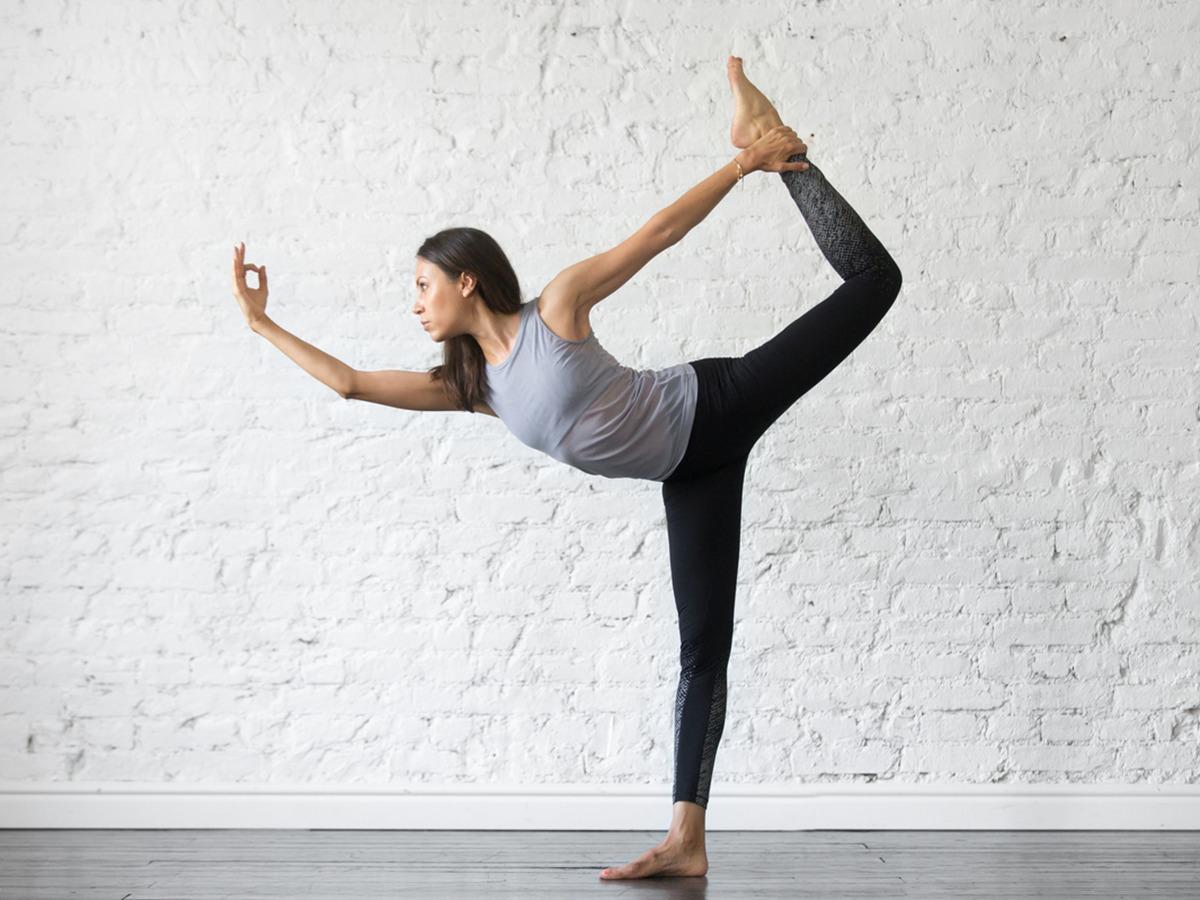
Natarajasana, also known as Dancer Pose, is an elegant and challenging yoga pose that symbolises the dancing form of Lord Shiva, the Lord of Dance. It combines elements of balance, flexibility, strength, and grace. Practising Natarajasana can help improve balance, focus, and concentration while also opening the chest and stretching the thighs.
Steps to practise Natarajasana (Dancer Pose):
1. Starting position:
• Begin by standing in Tadasana (Mountain Pose) with your feet together and arms at your sides.
2. Shift your weight:
• Shift your weight onto your left foot, grounding it firmly into the floor.
• Engage the muscles of your left leg for stability.
3. Lift your right leg:
• Bend your right knee and reach back with your right hand to grab the inside of your right foot or ankle.
4. Steady your balance:
• Keep your right knee pointing straight down and in line with your right hip.
• Avoid letting the knee open out to the side.
• As you lift your right foot, aim to maintain a slight bend in your left knee to avoid hyperextension.
5. Extend your left arm:
• Extend your left arm forward, parallel to the ground, and find your balance by engaging your core muscles.
6. Counterbalance and lift:
• Begin to hinge slightly forward from your hips while simultaneously lifting your right foot higher behind you.
• As you hinge, your chest and right thigh should come closer to parallel with the floor.
7. Focus and drishti:
• Find a point to focus on in front of you, known as your “drishti.”
• This fixed gaze will help you maintain balance and concentration.
8. Open your chest:
• As you lift your right foot higher, allow your left shoulder to open and draw your right shoulder back.
• This will help expand your chest and promote an open heart posture.
9. Hold the pose:
• Keep breathing steadily as you hold the pose for several breaths or as long as you feel comfortable.
• Feel the stretch in your thighs and the opening in your chest.
10. Release the pose:
• To release, gently release your right foot and lower it back to the ground.
• Stand in Tadasana for a moment to regain your balance and then repeat the pose on the other side, shifting your weight to your right foot and lifting your left foot.
Modifications:
• If it’s challenging to reach your foot with your hand, you can use a yoga strap or a belt around your ankle to extend your reach.
• Practising near a wall or using a chair for support can help maintain balance and stability.
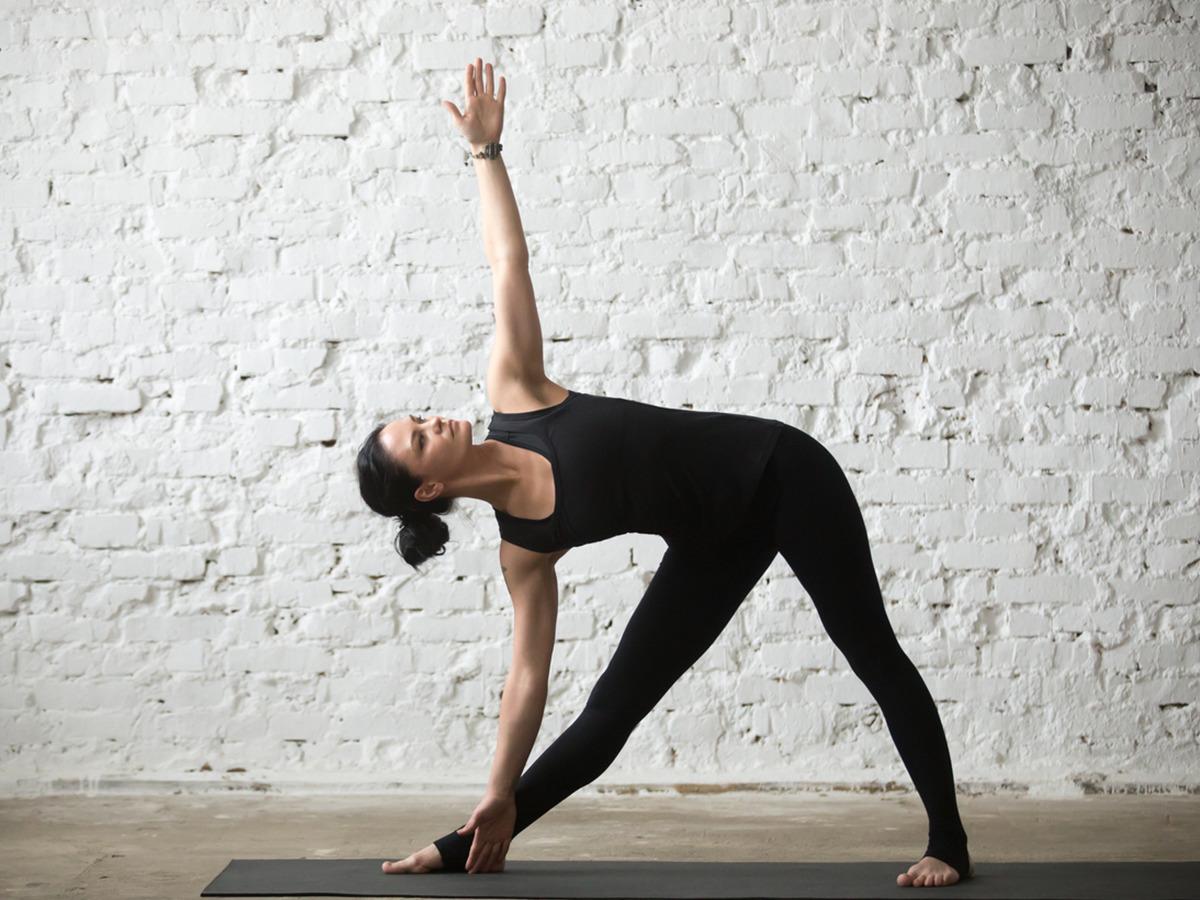
• Utthita Trikonasana (Extended Triangle Pose)
 © iStock
Extended Triangle Pose, also known as Utthita Trikonasana, is a foundational standing yoga pose that provides a deep stretch to the sides of the body and helps improve balance, flexibility, and strength. It is a part of many yoga sequences and is beneficial for opening the hips, hamstrings, and shoulders.
Steps to practise Extended Triangle Pose (Utthita Trikonasana):
1. Starting position:
• Begin by standing at the top of your mat with your feet about 3 to 4 feet apart.
• Turn your right foot out to the right, and your left foot slightly inward.
2. Align your body:
• Align your heels so that the heel of your front foot is in line with the arch of your back foot.
• Engage your leg muscles and keep your knees straight but not locked.
3. Extend your arms:
• As you inhale, extend your arms out to the sides, parallel to the ground, keeping them in line with your shoulders.
4. Reach forward:
• Exhale and reach your right hand forward, reaching as far as you can without collapsing your chest.
• Your right hand should be directly above or slightly in front of your right foot.
5. Lower your hand:
• As you continue to reach forward with your right hand, lower it down to rest on your shin, ankle, or the floor outside your right foot.
• Avoid placing your hand on the knee.
6. Extend your left arm:
• Inhale and extend your left arm straight up toward the ceiling, creating a straight line from your left foot to your left fingertips.
7. Gaze direction:
• Turn your gaze to look up at your left thumb or straight ahead if that strains your neck.
• This is your “drishti” and will help with balance and concentration.
8. Open your chest:
• Open your chest and extend your torso, creating a straight line from the top of your head to your left hand.
9. Hold the pose:
• Hold the pose for several breaths, maintaining the alignment and feeling the stretch along the side of your body and the inner thighs.
10. Return to starting position:
• To come out of the pose, inhale and press firmly into your feet.
• Engage your core as you lift your torso back to an upright position with both arms extended to the sides.
• Turn your feet to the other side (left foot out, right foot slightly in) and repeat the pose on the other side.
Modifications:
• If you find it challenging to reach the floor, you can use a yoga block placed beside your front foot to rest your hand on.
• You can also place your hand on your shin or ankle for more support and stability.
Social and lead images credits: Nadiadwala Grandson Entertainment
Special Story [widgetId: 20127]

